前陣子與 Backend Team 最終討論出要使用 UDP 方式直接將 JSON format 的 log message 送到 fluentd,實際接上後觀察發現會掉 log,以下是除錯過程的紀錄。
一開始不確定問題是 fluentd 丟棄太大的 UDP 封包還是 MTU 導致,於是建立了幾個特定大小的 JSON 檔案來測試:
1 | $ ls -la |
一開始先從 2000 bytes
的開始丟,檢查 fluentd log 沒發現有收到 2000 bytes
大小的 log,轉而測試 1400 bytes
到 1440 bytes
訊息後,發現超過 1432 bytes
的 log 像是被丟到黑洞一樣,不知去向
1 | $ cat size-2000 > /dev/udp/192.168.100.200/5160 |
使用 tcpdump
來檢查 5160 port 的封包狀況,確認的確是封包過大會有 UDP, bad length
的錯誤訊息:
1 | $ sudo tcpdump -i ens4 -nn -v 'port 5160' |
在 Google 上查了一下,看到有人提到 udp-fragmentation-offload
會導致這個問題,檢查了一下確實沒有開啟這功能
1 | $ sudo ethtool -k ens4 | grep udp-fragmentation-offload |
針對這功能研究了下,udp-fragmentation-offload (UFO)
主要是網卡提供硬體 IP Fragmentation 的功能,使得上層 Layer 3
不需要透過軟體 Fragmentation,減少 CPU 資源消耗,因此我認為 UFO 的啟用與否不影響 UDP Packet 的發送。
根據這個思維,利用 tcpdump
來觀察所有發送到目標 fluentd 的封包:
1 | $sudo tcpdump -i ens4 -nn -v -X 'dst host 192.168.100.200' |
可以觀察到確實 IP Layer 會將大於 MTU 的封包做切割,而切割後會喪失 UDP Header,但接收端應該要能夠在 IP Layer 重組(IP Header 有 ID、offset),而我們目前測試的架構為 VM
> GCP Internal Loadbalancer
> Kubernetes Worker Node
> Fluentd Pod (Kubernetes)
,為了定位問題點,我選擇先從 Kubernetes 內部測試被 IP 分片的 UDP Datagram 是否能組回且被 Fluentd 正確處理:
1 | $ ls -la |
同時間在 Fluentd Pod 上進行 tcpdump
:
1 | $ tcpdump -nn -v -A 'src host 10.203.0.20' |
可以看到接收端是有收到被分片過的 Packet,Fluentd 也有正確處理並送到 elasticsearch,因此可以確認說問題是出在 GCP Internal Loadbalancer
,根據文檔指出:
Google Cloud does not wait for all fragments; it forwards each fragment as soon as it arrives.
Because subsequent UDP fragments do not contain the destination port, problems can occur in these situations:
- If the target pools session affinity is set to NONE (5-tuple affinity), the subsequent fragments may be dropped because the load balancer cannot calculate the 5-tuple hash.
- If there is more than one UDP forwarding rule for the same load-balanced IP address, subsequent fragments may arrive at the wrong forwarding rule.
可以看到根據 session affinity
的設定,可能會導致後續 fragments
被送到不正確的目的地或是被丟棄,基本上可以確定這次掉 Log 是 Loadbalancer 導致,查了一下沒有找到能夠調整 session affinity
的 Kubernetes service annotations,暫時擱置著先,再想想要怎麼解決這問題…
2020/07/31 Update:
後續測試時發現部份 log message 會超過 UDP datagram 大小限制 65,535 bytes
,只好轉回用 TCP 做為連線協定,回去面對 Long-Lived TCP 連線的負載平衡問題,以及 TCP 連線開銷等等性能挑戰。
可以參考 Before Installation - Fluentd,有提到關於 File Descriptors 及 Network Kernel Parameters 等等的調整
最近在配置 Filebeat 在 Kubernetes 上解析 nginx-ingress logs 時遇到了一些困難,主要是 autodiscover
與 hints
部份在新舊版本上有些差異,這邊將我最後測試成功的配置給記錄下來
GKE Container-Optimized OS
Filebeat: 7.7.1
ElasticSearch: 7.7.1
Kubernetes/ingress-nginx: 0.32.0
elastic/filebeat
1 | filebeatConfig: |
ingress-nginx/ingress-nginx
1 | ## Annotations to be added to controller pods |
1 | # 查看分割表狀態 |
1 | Disk /dev/mmcblk0: 29.7 GiB, 31914983424 bytes, 62333952 sectors |
GPT
,並建立一個完整的磁碟分割1 | # 設定分割表 |
g
設定成 GPT
分割表 1 | Command (m for help): g |
n
建立新磁碟分區 1 | Command (m for help): n |
p
檢查分區狀況,沒問題後輸入 w
寫入 1 | Command (m for help): p |
/media/external-hd
下,並設定開機自動掛載1 | # 安裝 exFAT 相關套件 |
1 | ubuntu@raspberry-pi:~$ lsblk |
GKE 上原生的 Ingress Controller 限制非常多,需要設定 ServiceType=NodePort
才能使用,
於是我選擇 kubernetes/ingress-nginx 來作為 ingress 使用,不要和我一樣一開始裝成 nginxinc/kubernetes-ingress 的 Ingress Controller XD
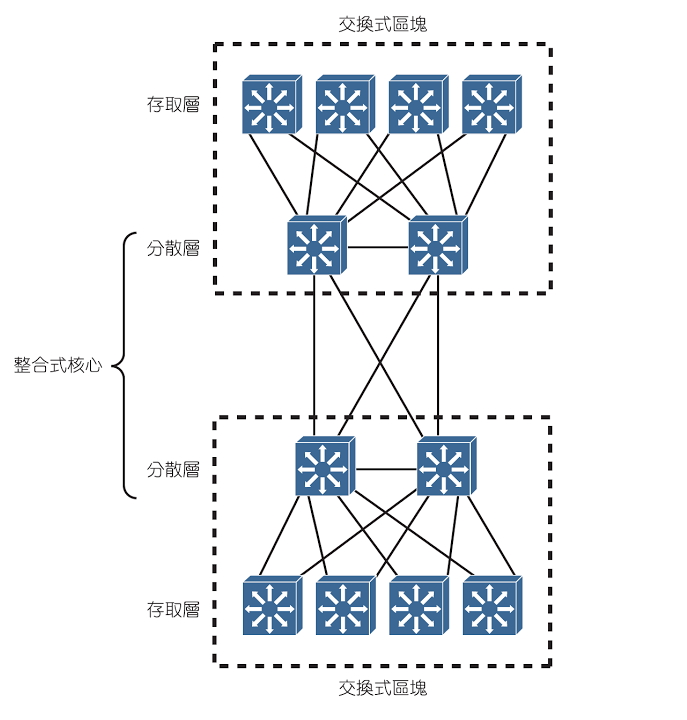
這張圖是 Kube Ingress Controller 在 GKE 上的架構,除了 external 以外我還需要 internal 的 ingress
所以我總共會起兩個 Ingress Controller,Ingress Class 分別是 nginx
與 nginx-internal
,
只要在 Ingress Controller 的 Service annotations 加上 cloud.google.com/load-balancer-type: "Internal"
,
GKE 就會起 Internal Loadbalancer 給你的 ingress controller,詳細可以參考以下步驟來安裝
1 | helm repo add ingress-nginx https://kubernetes.github.io/ingress-nginx |
1 | helm upgrade --install ingress-nginx --namespace default ingress-nginx/ |
internal-values.yml
的文件,放到 ingress-nginx/
底下 1 | controller: |
1 | helm upgrade --install ingress-nginx-internal --namespace default ingress-nginx/ -f internal-values.yml |
1 | # relk @ relk-Inspiron-7375 in ~ [0:35:09] |
1 | # External Ingress |
1 | # relk @ relk-Inspiron-7375 in ~ [0:59:35] |
最近公司同仁有在抱怨常常寄信到特定單位會寄丟,利用 Google CheckMX 檢查發現
1 | SPF must allow Google servers to send mail on behalf of your domain. |
根據說明文件表示,需要新增一筆 SPF TXT Record
1 | v=spf1 include:_spf.google.com ~all |
由於我們有利用第三方 Mail Service 來寄信,可以使用 SPF Wizard 來幫助產出正確的 SPF TXT Record
在 Any domains that may deliver or relay mail for this domain
新增所有 Mail Service 的 Domain
1 | _spf.google.com mailgun.org |
到 DNS Server 更新 SPF TXT Record
1 | v=spf1 include:_spf.google.com include:mailgun.org ~all |
回到 Google CheckMX 檢查,通過測試~~
]]>利用 openssl-cli 來測試目標 domain
1 | openssl s_client -connect example.com:443 |
檢視輸出訊息,會顯示 Certificate chain
、Server certificate
、Verification
、SSL handshake
等資訊
1 | --- |
根據輸出我們知道是 certificate chain
斷了無法驗證上游, 利用以下指令將 domain cert
與 intermediate cert
重新合併
1 | cat domain.crt gd_bundle-g2-g1.crt > combined_domain.crt |
到 web server 將合併過後的 certificate 替換上去,重新測試後就可以發現 certificate chain
重新接上了
1 | --- |
master
分支永遠是經過驗證且可佈署的Pull Request
時,自動 deploy 到 Staging 環境並執行 Smoke Testing
,等團隊其他成員或主管完成 Code Review
以及測試後才能 Merge
至 master
Tag
的 commit,才能 deploy 到 Production 環境(手動)1 | environment { |
1 | stage('Test') { |
COMMIT_ID
當作 Image Tag 1 | stage('Build') { |
1 | stage('Deploy - Staging') { |
Tag
的 Job 才會執行此階段 1 | stage('Deploy - Production') { |
1 | # 取得 Jenkinsfile 設定的 HOST_GROUP 環境變數,決定要 deploy 到 Staging 或 Production 環境 |
docker-compose.yaml
,以及將 container 所需環境變數寫入 .env
內 1 | - name: Copy docker-compose file |
1 | - name: Log into DockerHub |
./db_migrate.sh
腳本 1 | - name: DB migrate - flask-realworld-example-app |
1 | # 取得 Jenkinsfile 設定的 HOST_GROUP 環境變數,決定要測試 Staging 或 Production 環境 |
docker-compose.yaml
上的環境變數設定,都是由 Ansible Playbook 寫入 .env
檔案中,如果需要人工介入重啟 docker-compose 時才不會缺少環境變數 1 | version: '3' |
請先參考本篇進行初步設定:
GitHub Repository 有變動時自動通知 Jenkins 2 進行編譯建置 (GitHub Plugin)
調整 GitHub Webhook 設定,只勾選Branch or tag creation / deletion
、Pull requests
、Pushes
回到 Jenkins,設定 Discover tags
設定預設行為 Suppress automatic SCM triggering
,只有 master
和 Pull Requests
觸發 Jenkins Job
當新的 Pull Request 建立時,會自動 Trigger Jenkins 執行測試,以及回報結果至 GitHub PR 上
只有帶 Tag
的事件才會進入 Deploy - Production
階段
Ansible Playbook 執行截圖
Jenkins BlueOcean 截圖
Jenkins Stage View
最近同事抱怨 elasticsearch 常常掉資料,請我幫忙檢查下 ES 是不是有問題,看了下 cluster 的健康狀態也正常,node 硬碟剩餘空間也都還不少,手動打了下也有資料,實在摸不著頭緒。回頭往資料源頭查,kubectl logs <application_pod>
看了下也都有正常吐 log 到 stdout,往上檢查到 fluentd 時發現不太對勁,kubectl logs <fluentd_pod> | grep -v info
看了下發現報了 Warning:
1 | 2019-11-17 05:07:05 +0000 [warn]: #0 failed to write data into buffer by buffer overflow action=:block |
初步檢查看起來是 Buffer 炸掉了,調整一下 Buffer Size 先,順便把 timeout 時間拉長點觀察看看
1 | buffer_chunk_limit "#{ENV['FLUENT_ELASTICSEARCH_BUFFER_CHUNK_LIMIT_SIZE'] || '8M'}" |
隔天看 Log 還是炸掉,後來仔細爬了一下才發現有人提過這個 Issue: Fluentd stopped sending data to ES for somewhile. #525
官方其實 FAQ 就有寫了 XD
Stopped to send events on k8s, why?
fluent-plugin-elasticsearch reloads connection after 10000 requests. (Not correspond to events counts because ES plugin uses bulk API.)
This functionality which is originated from elasticsearch-ruby gem is enabled by default.
Sometimes this reloading functionality bothers users to send events with ES plugin.
On k8s platform, users sometimes shall specify the following settings:
1 | reload_connections false |
調整完後就沒有 timeout 過了,總算搞定了這問題。
]]>最近搞了台 Ryzen 筆電來跑 Linux,筆記下安裝上的細節
安裝部份就跳過了,開機後到 Grub 選單時,按 e
編輯開機選項,找到 Linux
開頭那行,移除 quite
,加上 noapic noacpi irqpoll
登入後,打開 Update Manager
> View
> Linux Kernels
選擇最新的穩定版 (當前是 5.3.0-19
)並安裝
打開 Terminal
,編輯 /etc/default/grub
,修改成以下資訊:
sudo vi /etc/default/grub
1 | GRUB_CMDLINE_LINUX_DEFAULT="amd_iommu=on ivrs_ioapic[4]=00:14.0 ivrs_ioapic[5]=00:00.2 splash" |
2020-05-15 Update:
改用以下這段,忘了從哪邊抄來的,系統比較不會凍結kernel: 5.3.0-40-generic
1 | GRUB_CMDLINE_LINUX_DEFAULT="vga=current ivrs_ioapic[4]=00:14.0 ivrs_ioapic[5]=00:00.2 iommu=pt idle=nomwait acpi_backlight=vendor acpi_enforce_resources=lax scsi_mod.use_blk_mq=1" |
sudo update-grub
更改預設的中文字體
sudo vi /etc/fonts/conf.avail/64-language-selector-prefer.conf
<?xml version="1.0"?> <!DOCTYPE fontconfig SYSTEM "fonts.dtd"> <fontconfig> <alias> <family>sans-serif</family> <prefer> <family>Noto Sans CJK TC</family> <family>Noto Sans CJK SC</family> <family>Noto Sans CJK JP</family> <family>Noto Sans CJK KR</family> </prefer> </alias> <alias> <family>serif</family> <prefer> <family>Noto Serif CJK TC</family> <family>Noto Serif CJK SC</family> <family>Noto Serif CJK JP</family> <family>Noto Serif CJK KR</family> </prefer> </alias> <alias> <family>monospace</family> <prefer> <family>Noto Sans Mono CJK TC</family> <family>Noto Sans Mono CJK SC</family> <family>Noto Sans Mono CJK JP</family> <family>Noto Sans Mono CJK KR</family> </prefer> </alias> </fontconfig> cd /etc/fonts/conf.d sudo ln -s ../conf.avail/64-language-selector-prefer.conf 64-language-selector-prefer.conf
重新開機
xinput list
找到觸控螢幕 ID xinput disable <ID>
安裝環境:CentOS 7
1. 關閉 SELINUX
1 | vim /etc/selinux/config |
2. 安裝 Zabbix 4.0 LTS
1 | rpm -Uvh https://repo.zabbix.com/zabbix/4.0/rhel/7/x86_64/zabbix-release-4.0-1.el7.noarch.rpm |
3. 若沒有安裝 MySQL 或 Maria DB,請按照以下步驟安裝 Maria DB
1 | vim /etc/yum.repos.d/MariaDB.repo |
貼上以下內容(根據需求參考以下網址調整 http://downloads.mariadb.org/mariadb/repositories/ )
1 | # MariaDB 10.3 CentOS repository list - created 2019-05-28 01:56 UTC |
1 | yum install MariaDB-server MariaDB-client |
4. 啟動 MariaDB 並設定開機啟動
1 | systemctl start mariadb |
5. 設定 MariaDB root 密碼
1 | /usr/bin/mysqladmin -u root password 'new-password' |
6. MariaDB 安全性設定
1 | /usr/bin/mysql_secure_installation |
7. 建立 Zabbix 用帳號 & Database
1 | mysql -u root -p |
8. 將 Zabbix 初始 SQL 架構和數據導入 MariaDB
1 | zcat /usr/share/doc/zabbix-server-mysql*/create.sql.gz | mysql -uzabbix -p zabbix |
9. 編輯 zabbix_server.conf
1 | vim /etc/zabbix/zabbix_server.conf |
10. 編輯 zabbix.conf
1 | vim /etc/httpd/conf.d/zabbix.conf |
11. 重開服務並設定開機啟動
1 | systemctl restart zabbix-server zabbix-agent httpd |
12. 打開防火牆
1 | firewall-cmd --permanent --add-port=10050/tcp |
13. 打開 http://server_ip_or_name/zabbix
測試
1 | Default Username: Admin |
1. 安裝 Grafana(https://grafana.com/grafana/download )
1 | wget https://dl.grafana.com/oss/release/grafana-6.2.1-1.x86_64.rpm |
2. 設定開機自動啟動 & 啟動 Grafana
1 | systemctl enable grafana-server |
3. 打開防火牆
1 | firewall-cmd --permanent --add-port=3000/tcp |
4. 打開 http://server_ip_or_name:3000
測試
1 | Default Username: admin |
5. 安裝 Zabbix Plugin
1 | grafana-cli plugins install alexanderzobnin-zabbix-app |
6. 增加 Data source
1 | URL: http://localhost/zabbix/api_jsonrpc.php |
7. 新增 Dashboard 監控設備
可以到這邊找模板 https://grafana.com/dashboards?category=zabbix
1 | hostnamectl set-hostname <new_hostname> |
1 | # 進入設定精靈 |
1 | yum install epel-release |
1 | yum install open-vm-tools |
1 | # 編輯 sshd_config |
1 | # 查看預計要退的版本號 |
1 | # 查看目前網卡套用的 Zone |
Restart
1 | [root@node01:~] esxcli system maintenanceMode set -e true |
Shutdown guest vm
1 | [root@node01:~] esxcli vm process list |
hostname
1 | [root@localhost:~] esxcli system hostname set --host=esxi |
Disk Clone
1 | [root@esxi:~] cd /vmfs/volumes/WD500G/ |
Enable SNMP
1 | [root@node01:~] esxcli system snmp get |
Disk Passthrough
https://kb.vmware.com/s/article/1017530
1 | [root@node01:~] ls -l /vmfs/devices/disks |
菜鳥如我最近剛學了些提升命令行下生產力的工具,筆記一下安裝方法。
1 | yum install zsh git |
1 | chsh -s /bin/zsh |
1 | sh -c "$(curl -fsSL https://raw.githubusercontent.com/robbyrussell/oh-my-zsh/master/tools/install.sh)" |
1 | vim ~/.zshrc |
1 | cd /etc |
1 | vim ~/.zshrc |
1 | eval "$(lua /etc/z.lua --init zsh enhanced once echo)" |
最近剛好要重灌電腦就順便裝了 LTSC 版本,本來想說不要亂下載非官方的 ISO 檔比較安全,特別去下載微軟官方評估版來安裝,結果 Eval 版本沒辦法用完整版序號來洗成正版,官方表明不能升級只能重裝,還好最後有找到免重裝的方法,重灌實在是太麻煩了…
路徑:HKEY_LOCAL_MACHINE\SOFTWARE\Microsoft\Windows NT\CurrentVersion
Composition edition ID
: EnterpriseSEditionID
: EnterpriseSProduct name
: Windows 10 Enterprise LTSC 2019修改完 Register 後不要重開機,直接掛載 ISO 進行升級並保留資料,記得要勾選下載更新,才不會有問題
1 | # 更新並安裝套件 |
1 | curl -sS https://packages.gitlab.com/install/repositories/gitlab/gitlab-ce/script.rpm.sh | sudo bash |
1 | mkdir -p /etc/gitlab/ssl |
1 | # 修改配置文件 |
1 | firewall-cmd --permanent --add-service=https |
1 | Switch#conf t |
1 | Switch#ping 192.168.1.100 |
1 | Switch#copy tftp flash: |
1 | Switch#show flash: |
1 | Switch#show boot |
1 | Switch#write |
An Device Admin account must be created on the Palo Alto Networks firewall to allow the controller to send data to it.
The built-in Admin account can be used for this purpose but that is not recommended.
It is better to create a new Admin account used solely for the purpose of communications between the controller and Palo Alto
To configure a new Palo Alto Networks profile
- Navigate to Configuration > Advanced Services > All Profiles > Other Profiles > Palo Alto Networks Servers
- Type the name of the profile and click Add
- Click on the name of the profile created to open the Profile Details window
- Enter the Host (IP address or hostname) of the Palo Alto Networks firewall
- Enter the Port (1 – 65535) of the Palo Alto Networks Firewall
Note: The port used by default is 443- Enter the Username of the Palo Alto Networks firewall.
The user name is between 1 and 255 bytes in length and must match the Admin Account previously created on the Palo Alto Networks firewall.
Note: Refer to section 3.3- Enter the Password of the username in Palo Alto Networks Firewall. The password is between 6 and 100 bytes in length and must match the password of the Admin account previously created on the Palo Alto Networks firewall.
- Re-enter the Password entered in the previous step
- Click Add
- Click Apply
To apply a Palo Alto Networks Server profile on the local controller, complete the following steps:
- Navigate to Configuration > Advanced Services > All Profiles > Other Profiles > Palo Alto Networks Active.
- Select Active Palo Alto Networks. To the right of this link, the name of the active profile is displayed.
- Other configured profile can be selected from the Active Palo Alto Networks Profile > drop-down menu.
To configure a new profile, select NEW from the drop down menu and complete the configuration details.- Once a profile is selected from the drop-down menu or a new profile is created, click Apply.
To enable a Palo Alto Netwokrs firewall integration in the AAA profile:
- Navigate to Configuration > Security > Authentication > AAA Profiles page
- In the AAA Profiles Summary, select the desired profile
- Check the PAN firewalls Integration check box
- Click Apply
1 | (Aruba7210) #ping <pa_ip_addr> |
1 | (Aruba7210) #show pan state |
1 | (Aruba7210) # show log system all | include |pan| |
Device > Setup > Interfaces > Management > Add Permitted IP Addresses
1 | (Aruba7210) # show log system all | include |pan| |
Palo Alto:
Device > Certificate Management > Certificate > Export Certificate
1 | Export Certificate |
Aruba Controller:
Configuration > Management > Certificates > Upload
1 | Upload a Certificate |
信任 CA 後依然顯示憑證有問題,嘗試以下做法
Palo Alto 重新產生自簽證書
Generate a Self-signed Root CA Certificate
- Select Device > Certificate Management > Certificates > Device Certificates.
- If the firewall has more than one virtual system (vsys), select a Location (vsys or Shared) for the certificate.
- Click Generate.
- Enter a Certificate Name, such as GlobalProtect_CA. The name is case-sensitive and can have up to 31 characters. It must be unique and use only letters, numbers, hyphens, and underscores.
- In the Common Name field, enter the FQDN (recommended) or IP address of the interface where you will configure the service that will use this certificate.
- If the firewall has more than one vsys and you want the certificate to be available to every vsys, select the Shared check box.
- Leave the Signed By field blank to designate the certificate as self-signed.
- (Required) Select the Certificate Authority check box.
- Leave the OCSP Responder field blank; revocation status verification doesn’t apply to root CA certificates.
- Click Generate and Commit.
Palo Alto 證書替換管理流量證書(HTTPS)
Replace the Certificate for Inbound Management Traffic
- Configure an SSL/TLS Service Profile.
1 | Select Device > Certificate Management > SSL/TLS Service Profile > |
- Apply the SSL/TLS Service Profile to inbound management traffic.
1 | Select Device > Setup > Management and edit the General Settings. |
1 | (Aruba7210) #show pan state |
1 | add-apt-repository ppa:mrazavi/openvas |
1 | apt update |
1 | greenbone-nvt-sync |
1 | service openvas-manager restart |
1 | https://<your-ip-addr>:4000 |
Qtier 技術實現自動分層儲存解決方案,可辨別資料存取頻率,自動將頻繁存取的「熱」資料移動到效能較高的磁碟階層,而將較少存取的「冷」資料移動到成本低、大容量的磁碟階層,讓企業享有效能與成本 (TCO) 兼顧的儲存服務。
- 靜態磁區使用所有於儲存池可用之空間,沒有快照、彈性調整容量的功能
- 組建完 Raid 後直接在上層建立檔案系統,效能會比多重完整配置來的好一些 (約 5% ~ 10%)
- 多重完整配置同時具有彈性及效能,可以靜態配置多個磁碟區,而非動態配置(彈性成長)
- 精簡配置對於儲存空間規劃提供了較佳的彈性。在磁碟區創建時並不會立即預備好實體的空間給予存取,而是在實際寫入時才會開始配置空間。
- 當你配置多個磁碟區時,初始為磁區設定上限值,當你寫入資料時才會動態配置磁區大小,因此若是有多個磁蝶區配置在上面,則會因為檔案不連續而影響效能。
首先,快照並非備份,只是將當前的檔案狀態保存,日後有異動或是被加密可以回復到拍攝快照時的狀態。
根據以上結果簡單的得出一個結論
- 快照和目錄的概念類似,上面記錄著拍攝當下時的檔案版本
- 快照使用空間跟檔案的新增和異動相關,只要你的檔案和第一份快照所記錄的不同,就會複製一份進快照空間,而做快照的動作只是建立版本號碼,可以讓你選擇回到哪個時間點的狀態
權限大小按照順序來排列是 Deny > Read/Write > Read-only
舉例來說:
假設你今天建立了一個MIS
使用者群組,底下有Tom
、Vincent
兩位使用者
然後A
資料夾MIS
群組權限 R/W,Tom
使用者權限 Deny
那結果就會是Tom
無法存取,MIS
其他人一樣可讀可寫
例子二:
A
資料夾MIS
群組權限 R/W,Vincent
使用者權限 Read-only
那Vincent
使用者對於A
資料夾的權限還是可讀可寫,因為 Read/Write > Read-only
所以 Read/Write 就會覆蓋掉 Read-only
首先,微軟的資料夾權限有分為 共用權限 以及 安全性權限 兩種
而 QNAP 所提供 Windows ACL 功能則是將 安全性權限 放給 Windows 做管理
以上資訊來自 QNAP 原廠工程師技術講習以及官方網站,若有理解錯誤請不吝告知,謝謝!
]]>可預測行為的網路模型:低維護性、高可用性
網路規劃應根據資料流來思考,理想狀況下,所有 End-User 資源存取的距離成本一致。
一個標準的網路模型:存取層、分散層、核心層
存取層是 End-User 的網路接入點,存取層交換器通常提供 User 之間 Layer 2(VLAN)的連結性。
此層的設備(有時被稱作 大樓存取層交換器 - Building access switch)應擁有下列功能:
分散層匯集了所有存取層設備的 Uplink,分散層交換器必須能夠處理來自所有連線設備的總流量,
也就是應該具備高密度的高速鏈路交換埠,以便支援存取層交換器所集中的流量。
由於 VLAN 與廣播領域集中在分散層,故通常需要支援路由繞送(Support Routing)、過濾及安全性。
分散層通常為第三層的邊界,此為路由 access VLAN 之處。
此層中的設備(有時被稱作 大樓分散層交換器 - Building Distribution switch)應擁有下列功能:
園區網路的核心層提供所有分散層設備之間的連接,故核心層(網路骨幹)交換的資料流必須盡可能地有效率。
核心層交換器應具有下列屬性:
在園區網路的核心層(骨幹)的設備應針對高效率交換進行最佳化,因為核心層必須處理整個園區龐大的資料量,故核心層應針對單純及效率問題來設計。
當園區網路成長到橫跨兩棟大樓或兩個地區時,核心層即可倍增
核心層彼此以 Full-Mesh 狀態建構,達到互相備援的狀態。
本篇文章為本人閱讀碁峰出版《CCNP Routing and Switching SWITCH 300-115專業認證手冊》第一章後所整理出的筆記,圖片皆是出自於該書內容,若有侵權疑慮請來信或留言告知,將盡速撤下文章。
]]>